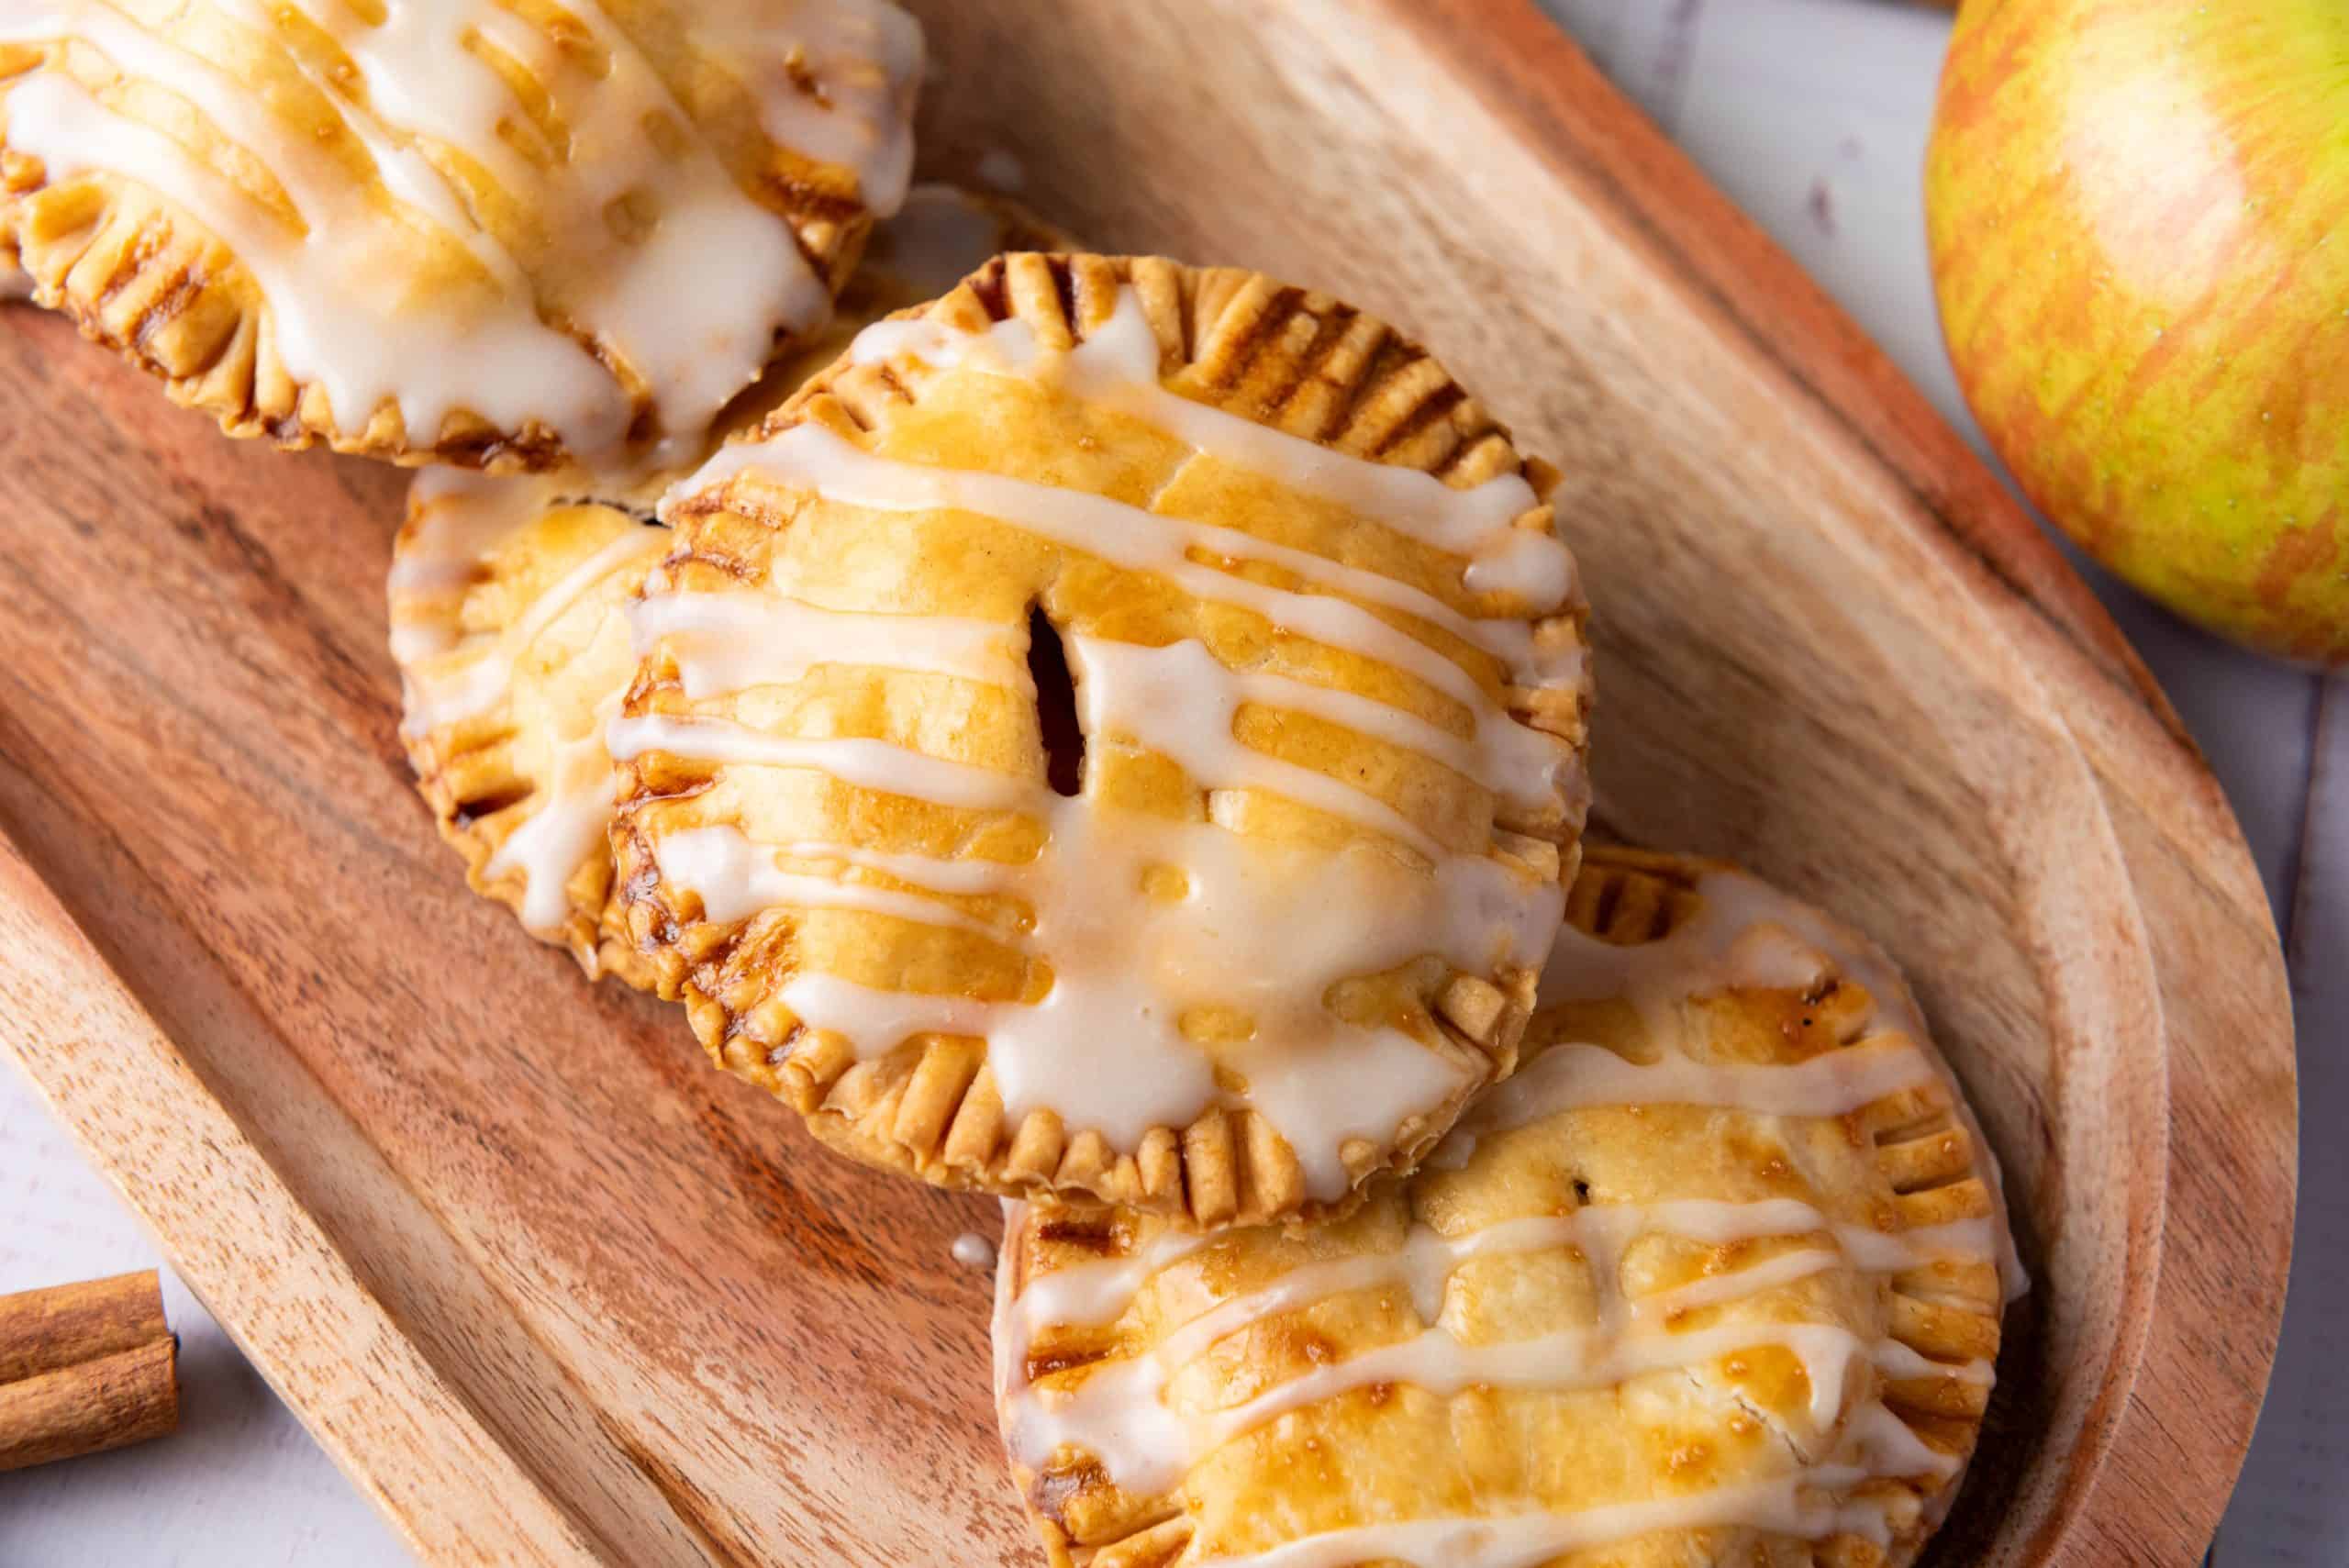
Easy Apple Hand Pies – A Fall Favorite
There’s something nostalgic and comforting about biting into a warm, flaky apple hand pie. I first started making these when I wanted all the flavor of homemade apple pie without the hassle of making a full one from scratch. These Apple Hand Pies are the perfect solution—easy to prepare, made with store-bought pie crust, and packed with tender, spiced apples. They’re just the right size for an afternoon snack or a cozy dessert, and they pack beautifully for lunchboxes or bake sales!
Why You’ll Love This Recipe
Portable & Shareable – Great for gatherings, picnics, or on-the-go treats.
Shortcut-Friendly – Made with store-bought pie crust to save time.
Sweet Cinnamon Glaze – A simple drizzle adds just the right finishing touch.
Ingredients

Servings: 12 hand pies
Prep Time: 15 minutes
Cook Time: 25 minutes
Cool Time: 10 minutes
Total Time: 50 minutes
For the Filling:
- 2 smaller Granny Smith apples, peeled, cored, and diced
- 1 Honeycrisp apple, peeled, cored, and diced
- 3 tablespoons granulated sugar
- 1 tablespoon brown sugar
- 1 teaspoon ground cinnamon
- 1 tablespoon lemon juice
- 1 tablespoon butter
For the Assembly:
- 2 sheets store-bought pie crust
- 1 egg, beaten (for egg wash)
For the Glaze:
- 1 cup powdered sugar
- 1–2 tablespoons milk
- ¼ teaspoon vanilla extract
Substitutions:
- Use all Granny Smith apples for a tart twist, or all Honeycrisp for a sweeter result.
- Swap the glaze with a dusting of cinnamon sugar before baking for a crunchy top.
Step-by-Step Instructions


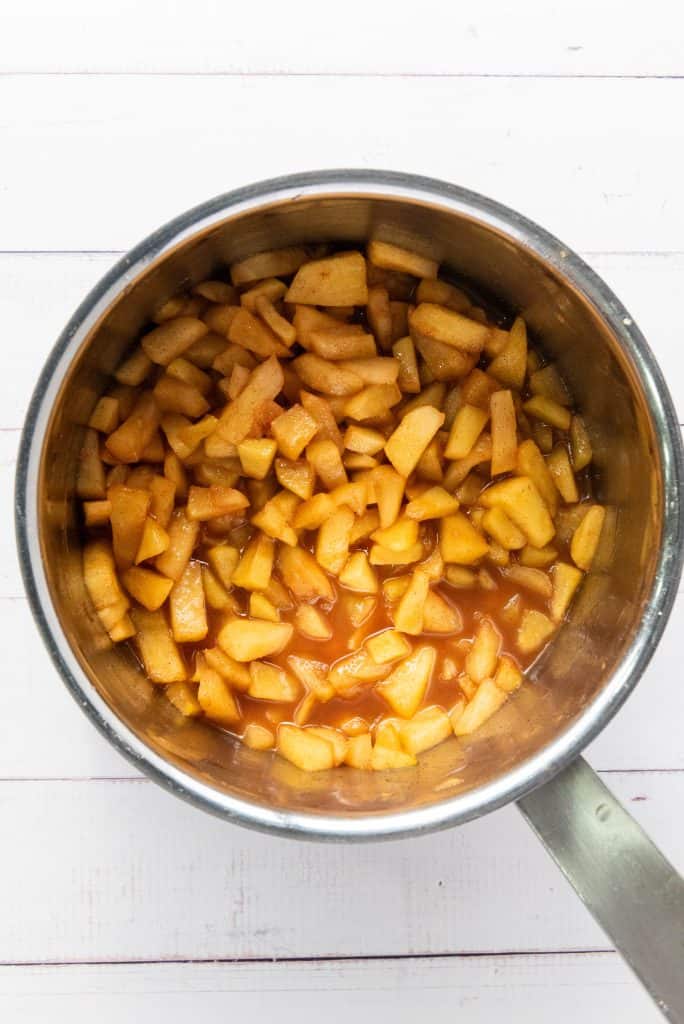
Step 1 – Make the Filling:
In a saucepan over medium heat, melt the butter. Add diced apples, sugars, cinnamon, and lemon juice. Cook for 5–7 minutes until softened. Let cool.
Step 2 – Prep the Crust:
Preheat oven to 400°F (200°C). Line a baking sheet with parchment. Roll out pie crusts and cut 4–5 inch circles using a cookie cutter or the rim of a glass.
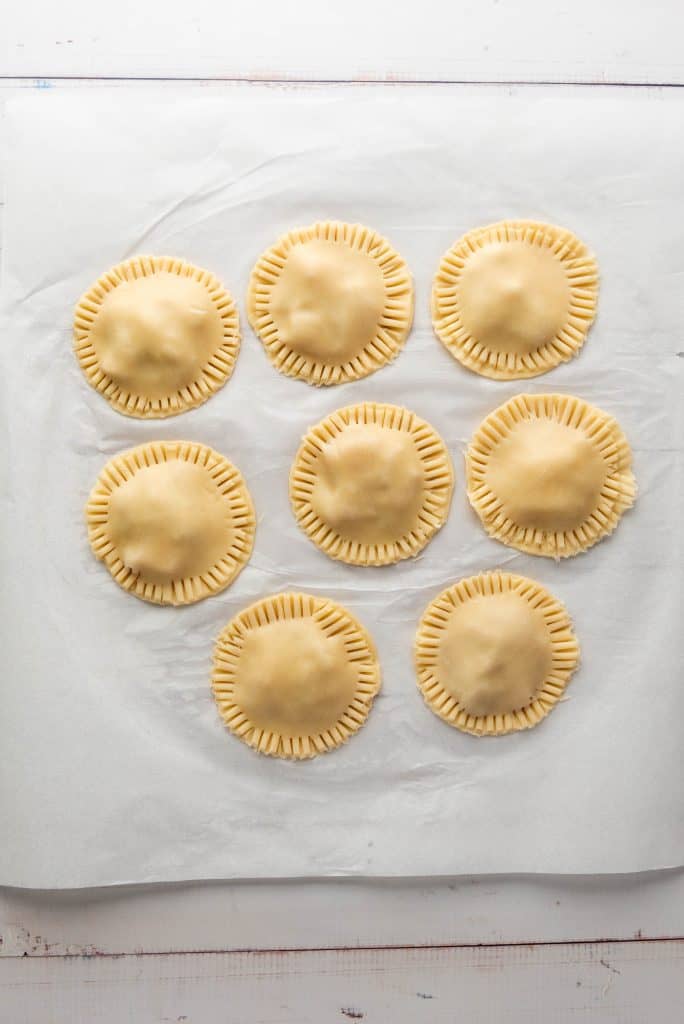
Step 3 – Fill & Seal:
Place a spoonful of apple filling on one dough circle. Top with another, press edges, and crimp with a fork to seal. Cut small slits in the tops for steam to escape.


Step 4 – Egg Wash & Bake:
Brush with beaten egg. Bake for 20–25 minutes until golden. Let cool for 10 minutes on the tray.
Step 5 – Glaze:
Whisk powdered sugar, milk, and vanilla until smooth. Drizzle over warm (not hot) hand pies. Let the glaze set before serving.


Tip: For extra golden crust, chill the assembled pies in the fridge for 10–15 minutes before baking.
Expert Tips
- Dice apples finely so the filling cooks evenly and fits neatly inside each pie.
- Seal edges well with a fork to prevent the filling from leaking.
- Let the pies cool slightly before glazing so it sets instead of soaking in.
Variations
- Add a pinch of nutmeg or allspice for deeper fall flavor.
- Make a caramel version by drizzling with caramel sauce instead of glaze.
- Try it with pear or peach filling for a seasonal twist.
Storage
- Room Temp: Store in an airtight container for up to 2 days.
- Fridge: Keep up to 5 days, reheat in toaster oven for best results.
- Freezer: Freeze unbaked or baked pies (without glaze) for up to 2 months.

FAQs
Q: Can I use a homemade pie crust?
A: Absolutely! If you have a go-to recipe, feel free to use it instead of store-bought.
Q: Can I make these ahead of time?
A: Yes. Assemble and refrigerate before baking, or bake ahead and glaze just before serving.
Q: What’s the best apple variety to use?
A: Granny Smith for tartness and structure, Honeycrisp for sweetness and moisture—a mix of both is ideal!
Final Thoughts
These Apple Hand Pies are everything you love about classic apple pie—wrapped up in a flaky, handheld version. They’re simple enough for a weeknight treat but special enough to serve at holiday gatherings. Don’t forget the sweet vanilla glaze—it’s the perfect finishing touch!

Apple Hand Pies
Ingredients
For the Filling:
- 2 medium Granny Smith apples peeled, cored, and diced
- 1 large Honeycrisp apple peeled, cored, and diced
- 3 tablespoons granulated sugar
- 1 tablespoon brown sugar
- 1 teaspoon ground cinnamon
- 1 tablespoon lemon juice
- 1 tablespoon butter
For the Assembly:
- 2 sheets store bought pie crust
- 1 egg beaten
For the Glaze:
- 1 cup powdered sugar
- 1-2 tablespoons milk
- 1/4 teaspoon vanilla extract
Instructions
Prepare the Apple Filling:
- In a medium saucepan, melt the butter over medium heat. Add the diced Granny Smith and Honeycrisp apples, granulated sugar, brown sugar, cinnamon, and lemon juice.
- Cook for about 5-7 minutes, until the apples have softened slightly.
- Remove from heat and let the filling cool
Assemble the Hand Pies:
- Preheat your oven to 400°F and line a baking sheet with parchment paper.
- Roll out the store-bought pie crust and cut out circles (about 4-5 inches in diameter) using a cookie cutter or the rim of a glass.
- Place a spoonful of apple filling in the center of one dough circle.
- Top with a second dough circle, gently pressing down around the edges to seal
- Crimp the edges with a fork to fully seal the pie.
- Brush the tops with the beaten egg for a golden finish
- Use a small knife to cut two small slits on top of each pie to allow steam to escape while baking.
Bake the Pies:
- Place the assembled hand pies on the prepared baking sheet and bake for 20-25 minutes, or until golden brown.
- Remove from the oven and let cool slightly.
Prepare the Glaze:
- In a small bowl, whisk together powdered sugar, milk, and vanilla extract until smooth.
- Drizzle the glaze over the cooled hand pies and allow it to set for a few minutes