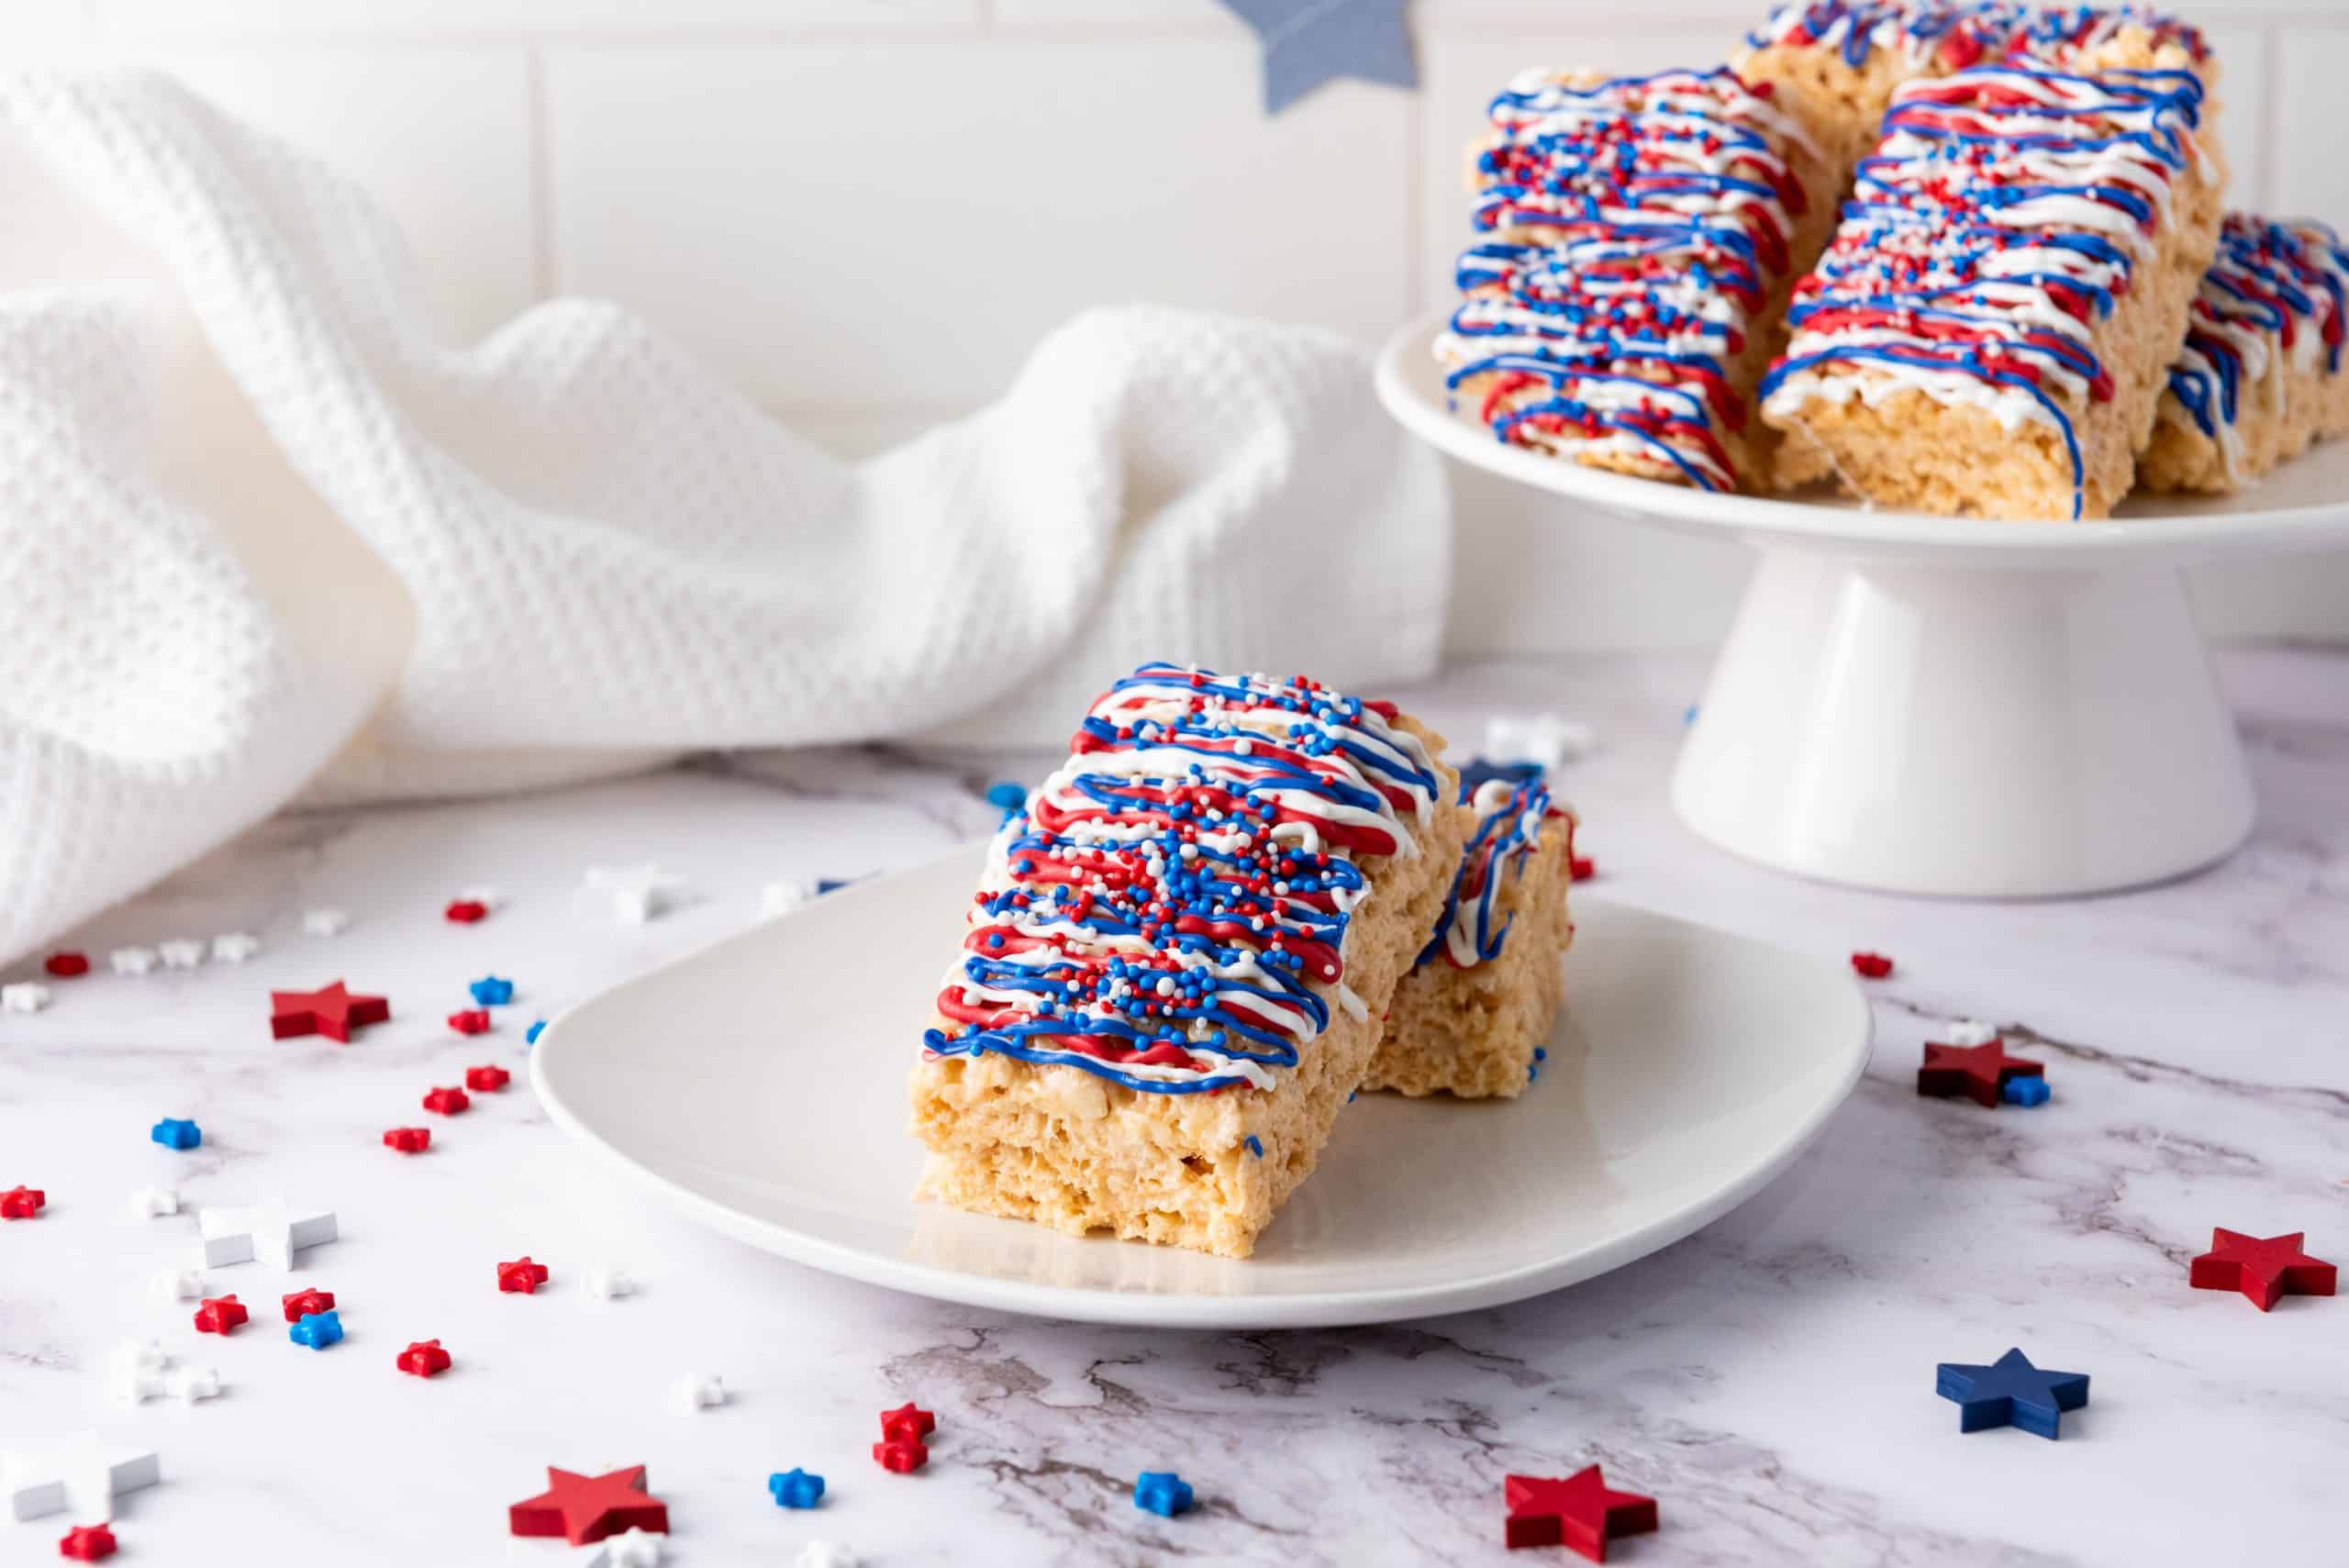
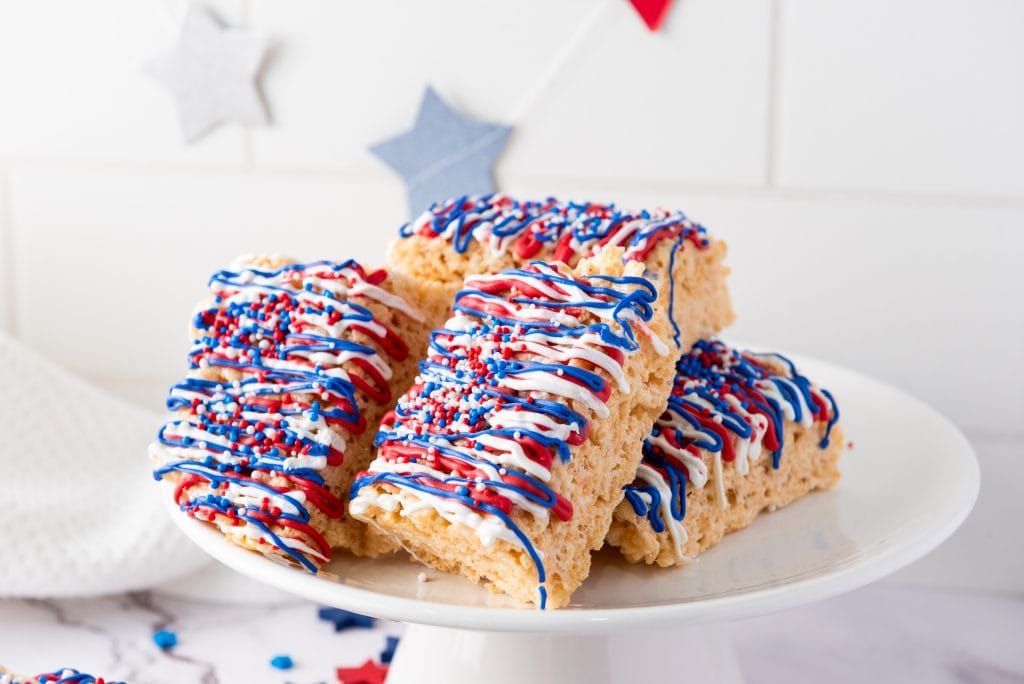
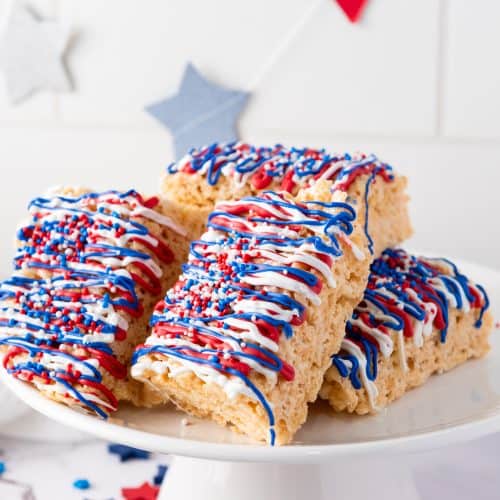
Easy Red, White, and Blue Rice Krispie Treats
Celebrate Independence Day with a fun and festive twist on a classic favorite—Independence Rice Krispies Treats! These red, white, and blue goodies are a playful and patriotic way to bring some star-spangled spirit to your 4th of July spread. With gooey marshmallows, crispy cereal, and colorful layers or swirls of patriotic flair, they’re a hit with kids and adults alike. Whether you’re heading to a picnic, hosting a backyard BBQ, or just looking for a fun treat to make with the family, these easy-to-make Rice Krispie treats are guaranteed to be crowd-pleasers. Let the celebration begin—one sweet bite at a time!
How to Make Independence Rice Krispies Treats
Step by Step Guide
These Independence Rice Krispies Treats are the perfect way to add a burst of patriotic fun to your 4th of July celebration. Easy to make, colorful, and deliciously nostalgic, they’re a treat everyone loves—from little kids to grown-up guests. Whether you’re layering them, cutting them into stars, or adding festive sprinkles, these no-bake goodies are as fun to decorate as they are to eat. Whip up a batch, share them with friends and family, and enjoy a sweet slice of Americana this Independence Day!
Looking for a fun and festive way to sweeten your summer celebrations? These Independence Rice Krispies Treats are the perfect patriotic snack. With classic gooey marshmallow goodness and a colorful red, white, and blue candy coating, they’re a hit at Fourth of July barbecues, Memorial Day parties, or any summer gathering. Plus, they’re easy enough to make with kids!
Independence Rice Krispie Treats Recipe
Prep Time: 20 minutes
Cooling Time: 1 hour
Total Time: 1 hour 20 minutes
Servings: Makes about 12–15 treats, depending on size
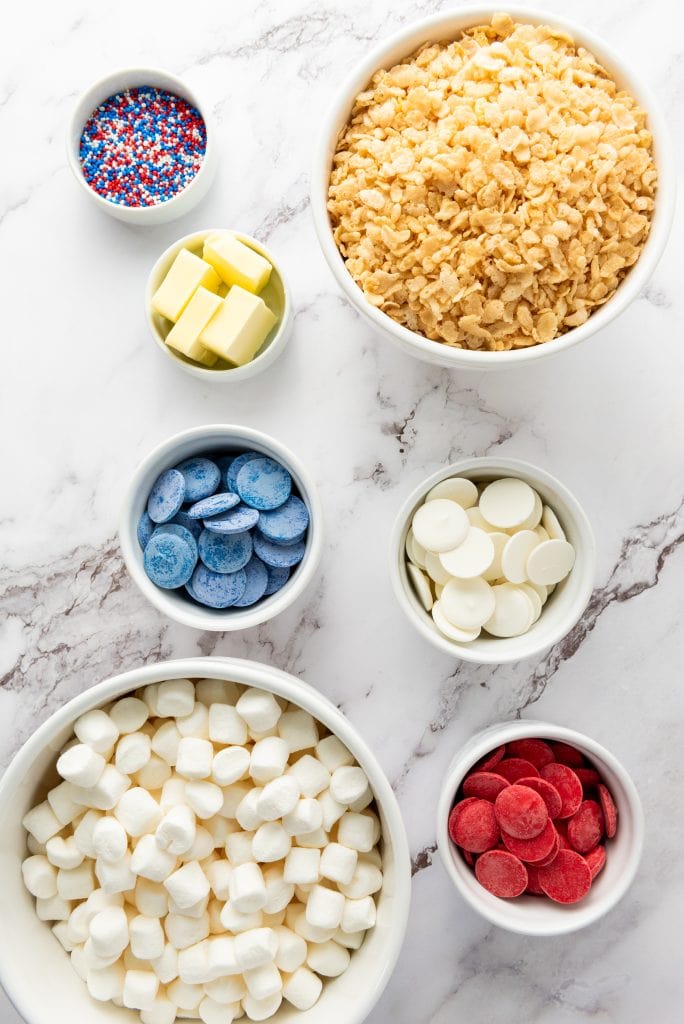
Ingredients
- 5 cups Rice Krispies cereal
- ¼ cup butter
- 4 cups mini marshmallows (about 10 oz)
- ½ cup red meltable candies
- ½ cup white meltable candies
- ½ cup blue meltable candies
- Sprinkles of your choice
Instructions
1. Prepare the Rice Krispie Base:
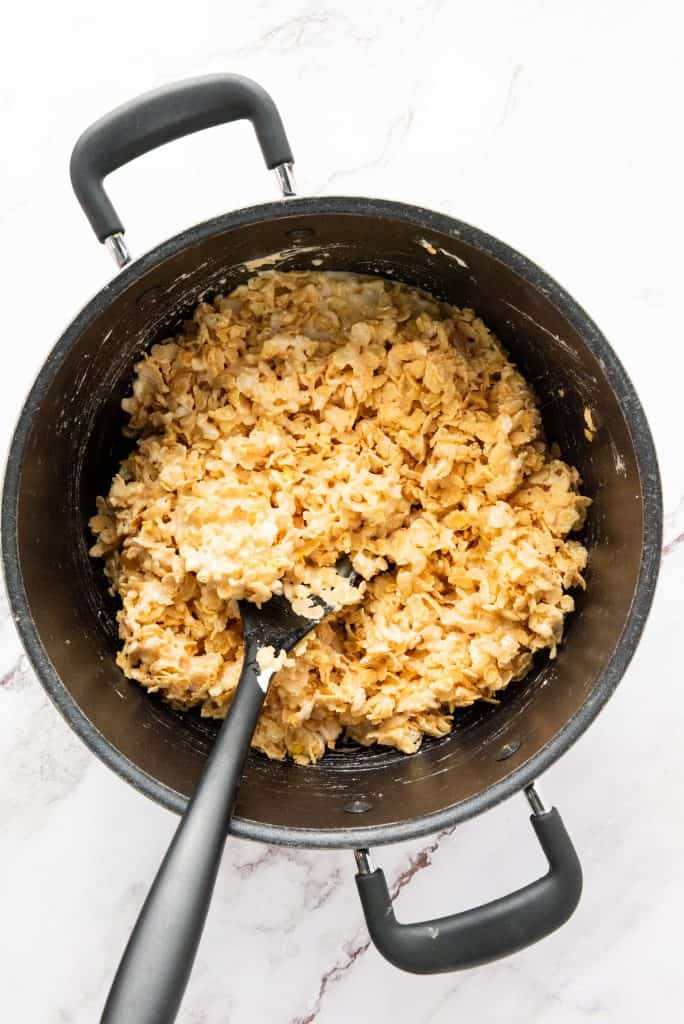
In a large pot, melt the butter over low heat. Add the mini marshmallows and stir continuously until fully melted and smooth.
2. Mix and Press:
Remove the pot from the heat and stir in the Rice Krispies cereal until evenly coated.
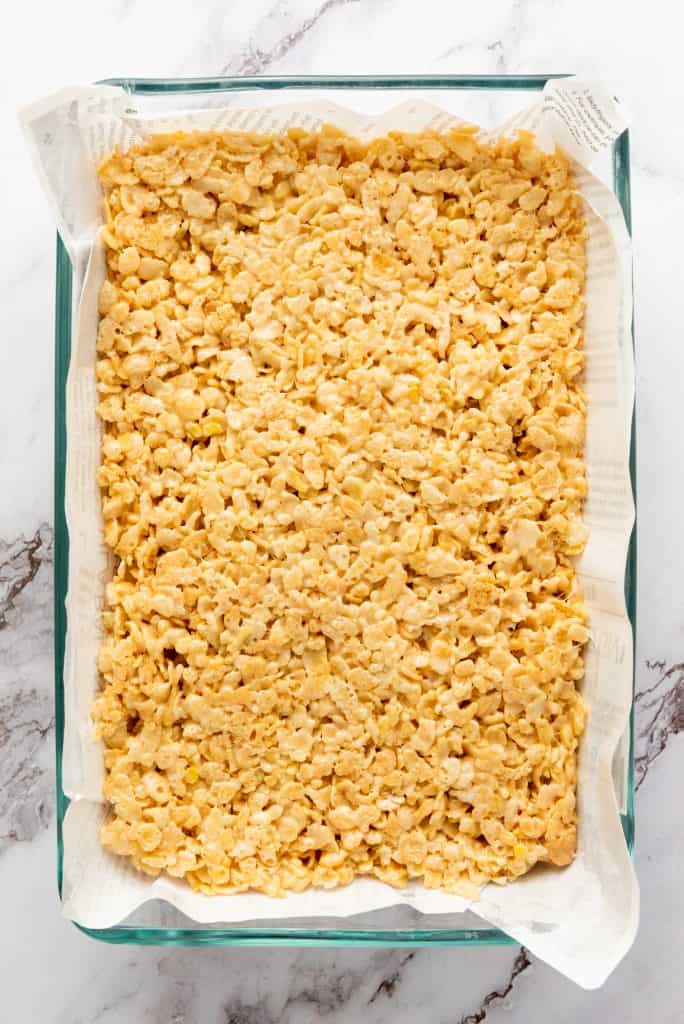
Press the mixture firmly into a 9×13-inch pan lined with parchment paper or lightly greased. Flatten the top evenly with a spatula or wax paper.
3. Let It Set:
Place the pan in the refrigerator for at least 1 hour to cool and set.
4. Cut into Squares:
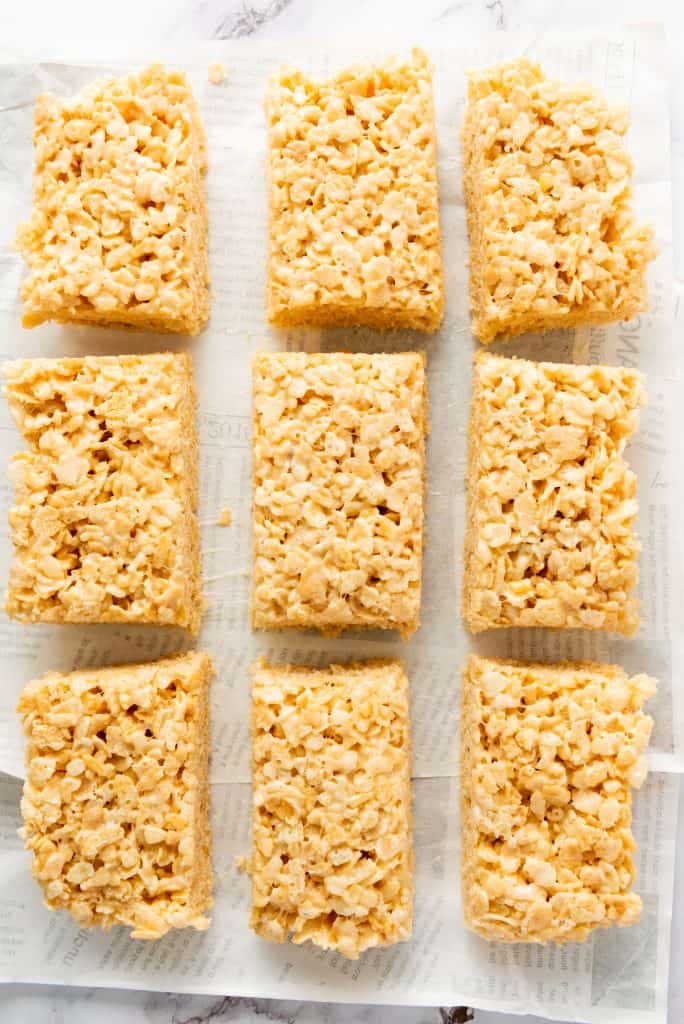
Once set, lift the entire block out using the parchment paper. Transfer to a cutting board and slice into squares or rectangles, depending on your preference.
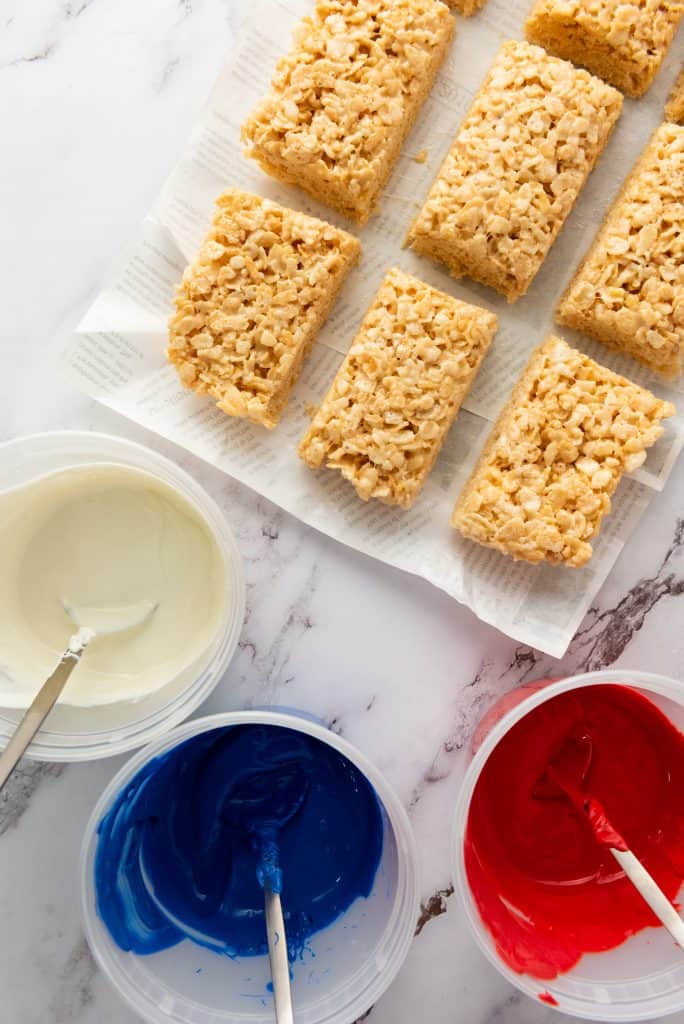
5. Melt the Candy Coatings:
Melt the red, white, and blue candy melts in separate bowls according to the package directions. Use deep bowls to make dipping easier.
6. Dip and Decorate:
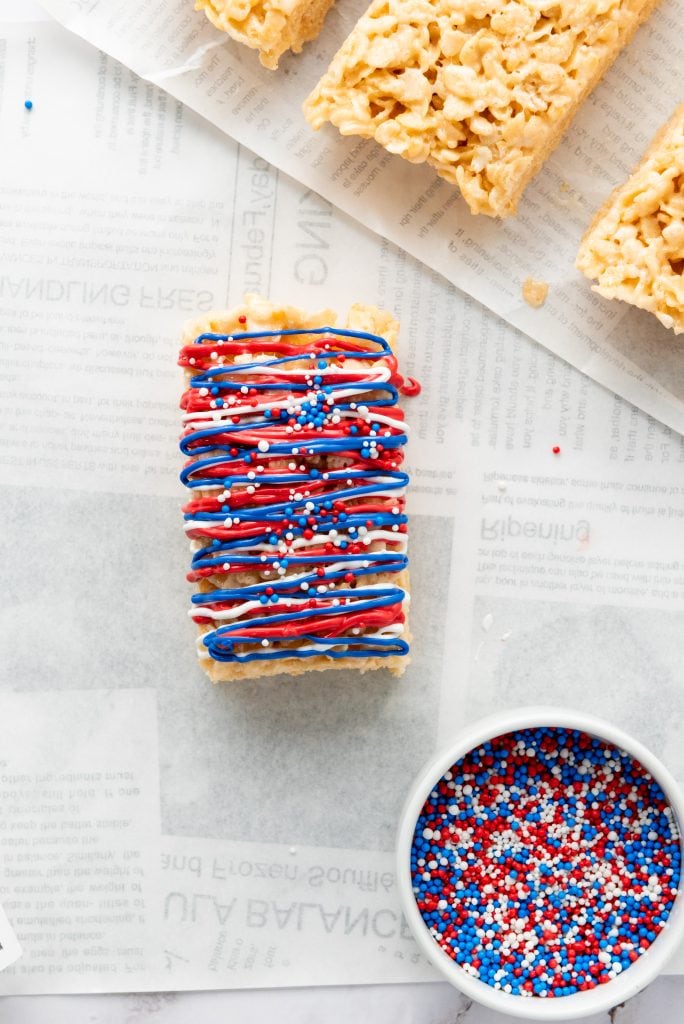
Dip each Rice Krispies treat into one of the melted candy colors, covering as much as you’d like. Let any excess drip off.
Place on a sheet of parchment paper and immediately top with your choice of sprinkles while the candy is still wet.
7. Cool and Serve:
Allow the candy coating to fully harden at room temperature or refrigerate for quicker results. Serve once set, and enjoy!
Variations
Looking to mix things up? Try these fun and festive Rice Krispie Treat variations:
- Add a Flavor Twist: Stir in 1/2 teaspoon of vanilla or almond extract into the melted marshmallow mixture for added depth.
- Layered Look: Instead of dipping, divide the treats into three batches and color the melted candy melts before spreading each in layers in the pan (red, white, and blue layers).
- Use Cookie Cutters: Cut treats into stars or flag shapes for a more patriotic presentation.
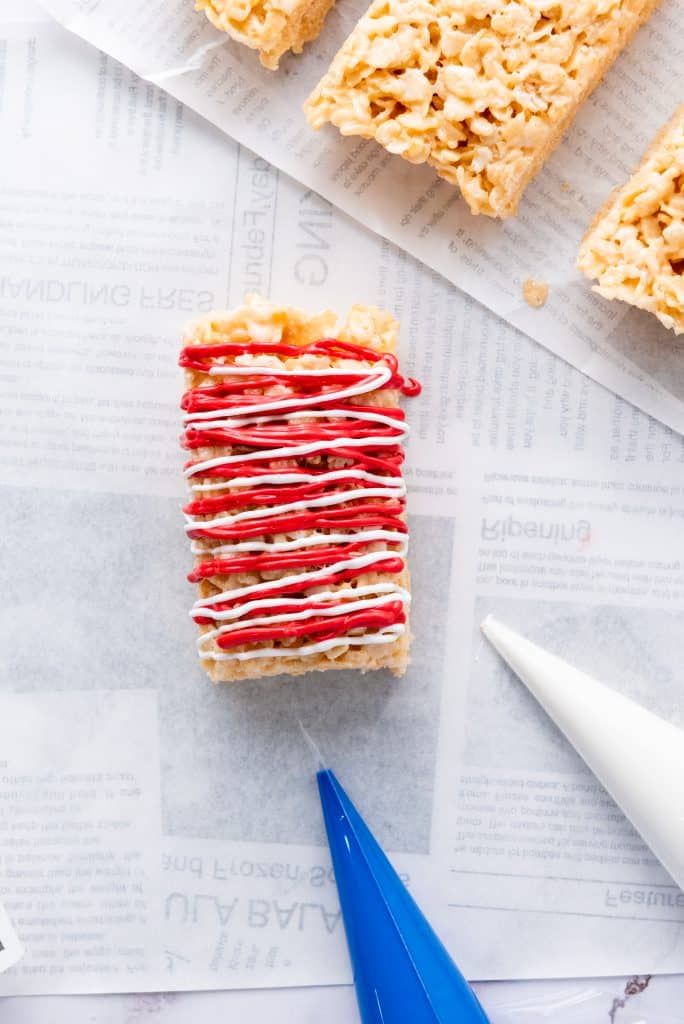
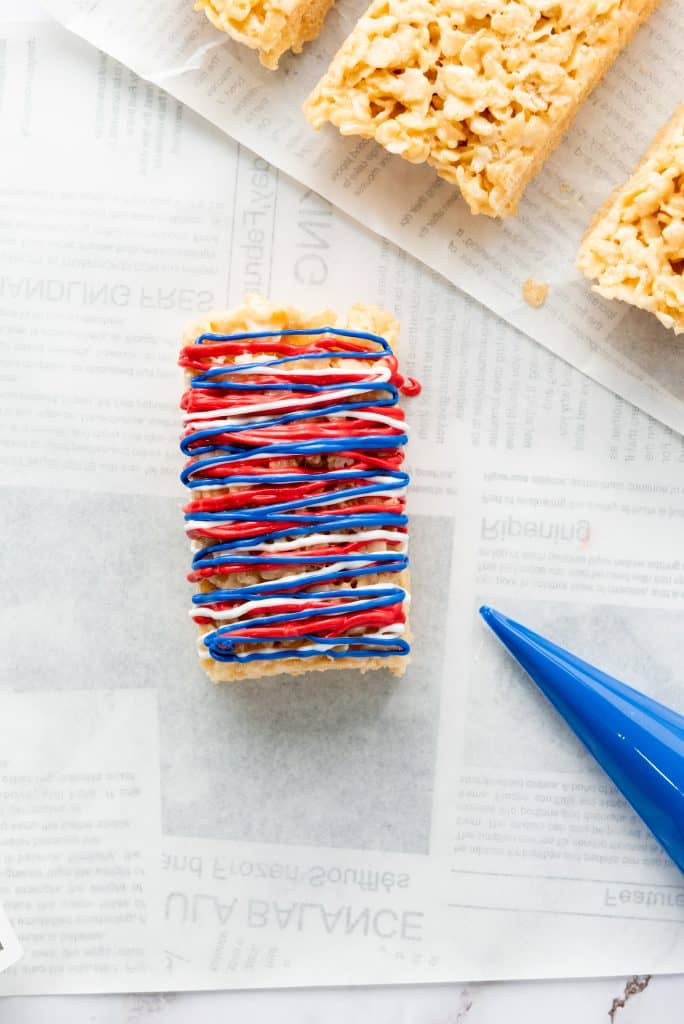
- Chocolate Drizzle: Skip dipping and instead drizzle melted candy melts in red, white, and blue across the top of the treats for a less messy option.
- Add Crunch: Mix in crushed pretzels or mini M&Ms for added texture and a salty-sweet combo.
Expert Tips
- Use Fresh Marshmallows: Older marshmallows tend to melt poorly and create a stiff texture. Fresh marshmallows give you that soft, gooey bite.
- Don’t Overheat the Marshmallows: Melting them slowly over low heat prevents hard treats. High heat can make them tough.
- Spray Your Hands or Spatula: Lightly grease your hands or spatula with non-stick spray when pressing the mixture into the pan to avoid sticking.
- Work Quickly: Once the mixture is ready, act fast before it starts to set—it becomes harder to shape as it cools.
- Double the Batch: If you’re making these for a party or large gathering, consider doubling the recipe in a large sheet pan.
Storage Tips
- Room Temperature: Store Rice Krispie Treats in an airtight container at room temperature for up to 3 days.
- Layer with Wax Paper: If stacking, place wax or parchment paper between layers to prevent sticking.
- Refrigeration (Optional): You can refrigerate them if your home is warm, but they may become harder—let them sit at room temperature before serving.
- Freezing: Wrap individual treats tightly in plastic wrap and place in a freezer-safe bag. Freeze for up to 6 weeks. Thaw at room temperature before enjoying.
FAQ
Can I use regular-sized marshmallows instead of mini?
Yes! Use about 40 large marshmallows in place of the mini ones.
Can I make these treats ahead of time?
Absolutely. Make them 1–2 days in advance and store them in an airtight container until ready to serve.
What kind of sprinkles should I use?
Any red, white, and blue sprinkles will work—stars, jimmies, or sugar pearls all add great texture and color.
Can I skip the candy melts?
Yes. You can leave them plain or drizzle with regular chocolate and decorate with sprinkles.
Do these travel well for parties or picnics?
Yes, they’re perfect for transporting. Just be sure to keep them in a sealed container and out of direct sunlight to avoid melting.
A Festive Treat Everyone Will Love
These colorful Independence Rice Krispies Treats are an easy and crowd-pleasing addition to your patriotic party spread. They store well in an airtight container for a few days—if they last that long!
Independence Rice Krispie Treats
Ingredients
- 5 cups Rice Krispie cereal
- 1/4 cup butter
- 4 cup mini marshmallows about 10 oz.
- 1/2 cup red candy melts
- 1/2 cup white candy melts
- 1/2 cup blue candy melts
- Sprinkles (optional) red, white, blue or any color
Instructions
Preparing the base treat
- Melt the butter in a large pot over low heat.Add the mini marshmallows, stirring until completely melted and the mixture issmooth.Remove the pot from heat and immediately mix in the Rice Krispies cerealuntil well coated.
- Press the mixture firmly into a 9×13 inch bakingpan lined with parchment paper or lightly greased. Flatten it evenly across thepan.
- Let the Rice Krispie treat cool and set in therefrigerator for at least one hour.
Cutting the Treats
- Once set, lift the whole treat out of the panusing the edges of the parchment paper. Place it on a cutting board and cutinto squares or rectangles to your preferred size.
Melting the Candy
- Separately melt the red, white, and bluemeltable candies according to the package instructions. Use bowls deep enoughf or easy dipping.
Dipping the Treat
- Dip each Rice Krispie square into the melted candy of your choice, covering it to your liking. Let any excess drip off.
- Place the dipped treats onto a sheet ofparchment paper. While the candy coating is still wet, sprinkle with yourchosen sprinkles for a decorative touch.
Cooling
- Allow the treats to set completely at roomtemperature, or in the refrigerator for a faster setting